
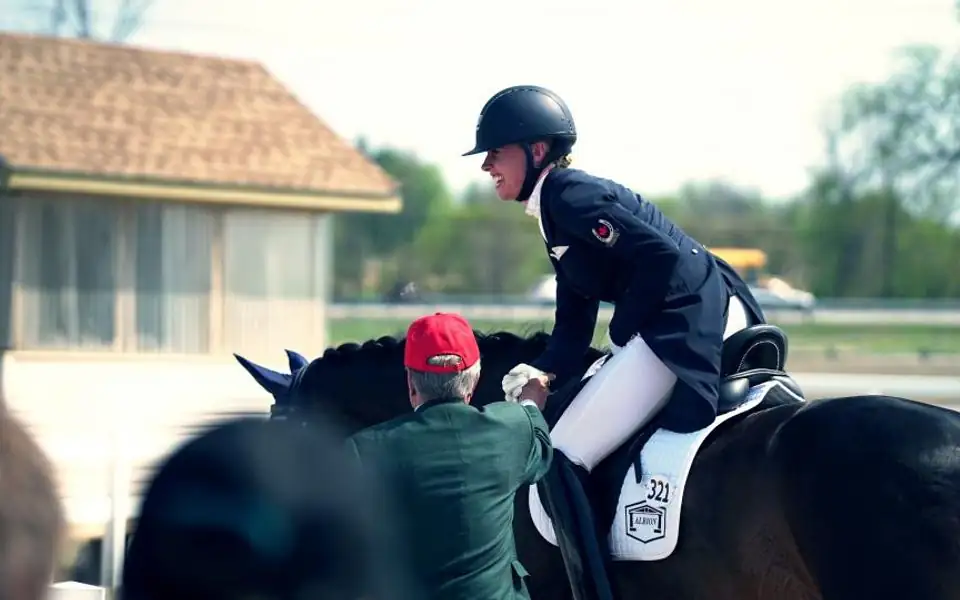
A first horse riding lesson rarely looks like the gallop people picture. Most of the hour is spent on the ground and at a walk: meeting the animal, learning where to stand, brushing and saddling, then a short, supervised ride in an enclosed arena. Knowing that in advance takes much of the pressure off, and it makes the practical questions easier to answer, such as which boots to wear, whether you need your own helmet, and how to dress for a wet morning in the Fraser Valley.
How a typical first lesson runs
An instructor usually starts with a short tour of the arena, the tack room, the paddocks and any areas that are off limits to visitors. Basic safety guidelines come next. Expect to hear how to approach from the front and side rather than from behind, why sudden movements and loud voices are discouraged, and what to do if the animal you are holding spooks.
Some schools have the lesson horse caught, groomed and tacked before you arrive, often for insurance or time reasons. Others treat the work on the ground as part of the session and keep the ride short, and a few ask beginners to complete one or more ground-only sessions before they ride at all.
A private lesson is common at the start, since the instructor can lead the horse or keep it on a lunge line while you find your seat. Group horse riding lessons cost less and suit a rider who already feels relaxed around large animals.
Questions to ask when you book
A two-minute phone call or email prevents most first-day surprises. Useful things to check:
- Will a helmet be provided, and in what sizes? If you own one, is it acceptable?
- Is the session private or in a group, and how long will you actually be in the saddle?
- Does the school have age, height or weight limits for its lesson horses?
- Which style is taught, English or Western, and does the program follow a set of levels?
- Is the arena covered or outdoors, and are rides cancelled in heavy rain or extreme heat?
- Is trail riding offered once you have the basics?
- Do you need to sign a waiver or fill out a medical form before arriving?
Mention any old injuries, back trouble, nerves or past experience with horses at this point. That information helps the instructor choose a suitable mount and decide how much time to spend on the ground.
What to wear for horseback riding
Special riding gear can wait. What matters is clothing that keeps you safe in the saddle and comfortable around an animal that sheds, sweats and occasionally steps on feet.
Helmet
This is the one essential safety item. Horse Council BC strongly recommends that anyone who rides or drives wear a helmet designed for equestrian use and certified to a recognized standard, such as ASTM/SEI, BSI/BS EN, EN, AS/NZS or VG1, with the harness fastened. There is no Canadian CSA standard for equestrian helmets, so look for one of those labels inside the shell. A bicycle or ski helmet is built for different impacts and is not a substitute. Most schools lend helmets to beginners, and a borrowed one is fine if staff help you size it. Worn correctly, it sits level about a finger's width above the eyebrows, and with the harness fastened the shell moves with your scalp instead of sliding. A helmet that has taken a hard knock should be replaced.
Footwear
Choose a closed-toe boot with a smooth sole and a small heel of roughly an inch. The heel is a safety feature: it stops your foot sliding through the stirrup, which makes for safer riding. Paddock boots, short jodhpur boots and plain cowboy boots all work. Avoid running shoes, hiking boots with deep lugs that can catch, and anything open-toed.
Pants, tops and gloves
- Pants: long and close-fitting. Jeans are fine for a start, though the inner seam can rub; stretch tights or breeches are more comfortable. Shorts let the saddle and stirrup leathers chafe bare skin.
- Tops: fitted layers you can tuck in. Loose fabric can snag on tack or flap and startle a nervous mount.
- Gloves: thin leather or gardening gloves prevent blisters from the reins.
- Leave at home: dangling jewellery, scarves and strong perfume.
Dressing for Fraser Valley weather
Lessons in Langley, Aldergrove and the surrounding area run through a long rainy season, and outdoor arenas can be muddy from fall to spring. A waterproof shell short enough not to cover the saddle, a warm mid-layer and wool socks help on a cold, damp day; in summer, bring water, sunscreen and a light long-sleeved shirt.
Horse care before you mount
Where ground work is included, this is often the part beginners remember best. You may learn to put on a halter and lead on a lead rope, walking at the shoulder rather than in front. Grooming follows: a curry comb to loosen dirt, a stiff brush to sweep it away, and a hoof pick to clear the feet. Expect to be shown how to ask for each foot so the animal lifts it instead of leaning on you.
Grooming is more than tidying up. It is a safety check for cuts, heat or sore spots before a saddle goes on, and it gives a nervous rider time to get used to the size and movement of the animal. Ears pinned back, a swishing tail or a raised hind foot are signals to give space, and a good instructor will guide you through them as they happen. That habit of noticing is where communication and trust between horse and rider begin.
Tacking up comes last: saddle pad, saddle and girth, then the bridle. Most people need several lessons before they can do it confidently on their own.
Getting on and riding at a walk
Most beginners learn to mount from a mounting block, which is easier on the rider and on the animal's back than climbing up from the ground. The instructor will hold the reins, check the girth and set the stirrups to the proper length.
Once you are up, the focus shifts to position. Sit tall in the centre of the saddle, let your legs hang long with your heels a little lower than your toes, and keep your hands low and quiet. Balance, and with it control, comes from your seat and core rather than from gripping the reins.
From there you will learn the basics at the walk:
- Asking for forward movement with a gentle squeeze of the lower leg.
- Steering, using a light, even feel on the reins and a turn of the shoulders to guide the turn.
- Stopping by sitting deeper and closing your fingers on the reins rather than pulling.
- Dismounting safely, with both feet out of the stirrups before you swing down.
These signals are called aids or cues, the basic communication between rider and horse. Experienced school horses know them well and forgive clumsy ones, which is exactly why they are used for teaching. Some riders try a few steps of trot near the end, but many first sessions stay at a walk, and that is normal.
Nerves, balance and sore muscles
Feeling nervous next to an animal that weighs several hundred kilograms is reasonable, and instructors expect it. Telling them helps, because they can slow down, stay close, or spend more time on the ground until you feel confident. Tension in the rider travels down the reins, so a few slow breaths before mounting can genuinely change the ride.
Two physical problems show up in almost every first horse riding lesson. Beginners grip with their knees and hands when they lose their balance, which tips them forward and tightens the reins. And horseback riding works the inner thighs, lower back and core in ways most people never train, so stiffness the next day is common. Eating something light an hour before, drinking water, and walking around the yard after you dismount all take the edge off. Regular lessons are how riders build the strength that makes it feel easier.
Choosing a beginner-friendly school
Horseback riding lessons vary widely between schools, and the quality of the program is more important than the price of the first hour. Look for an instructor who is certified, or who clearly has experience teaching riding for beginners. In Canada, instructors and coaches are certified through the National Coaching Certification Program (NCCP), with standards set by Equestrian Canada and certification delivered in BC by Horse Council BC. Many schools also follow the national Equestrian Canada LearnToRide program, whose two Foundations levels cover English and Western basics together before riders specialize.
The cheapest research is to sit in on a beginner class before you book. Notice whether the instructor explains why, not just what, and whether nervous riders get time to settle. Proper horse welfare shows in small things: school horses that stand quietly to be tacked, move without limping and carry some condition over the ribs. Ask what the safety procedures are for a fall or a loose horse; a good school answers without hesitating.
After your first horse riding lesson
Early horse riding lessons repeat a lot of the same material, and that is by design. Each one should add a little: grooming with less help, steering around cones, a first rising trot. Progress depends on how often you ride, and riders who book a weekly horseback riding lesson usually move along faster than occasional ones. Learning to ride also opens other doors later, from trail rides in the valley to equestrian disciplines such as dressage, jumping or barrel racing. For now, the goal is simpler: finish the first session safe, a little tired, and curious about the next.
